Monday, January 12, 2015

Dual boot Windows 8 (bitlocked) and Ubuntu 14.04.1 LTS (encrypted volume)

Dual boot Windows 8 (bitlocked) and Ubuntu 14.04.1 LTS (encrypted volume)

Whats needed:
  1. Windows 8 install DVD
  2. Ubuntu Mini Install CD https://help.ubuntu.com/community/Installation/MinimalCD   
  3. Ubuntu 14.04.1 Desktop Install DVD http://www.ubuntu.com/download/alternative-download
Knowledge recommended:
  1. Basic knowledge of Linux commands

START STEPS 

1. Install Windows 8.
2. Windows Key + R
3. run diskmgmt.msc --> yes to UAC
4. Right click the partition to shrink
5. I decided to make my Linux partition 220
6. Results --> Close
7. Now we have to encrypt with bitlocker
8. Windows key + R
9. manage bitlocker

10. Turn on Bitlocker --> yes UAC
11. Print or write down the key.  You will need it later --> Next
12. Encrypt used disk space is faster --> Next
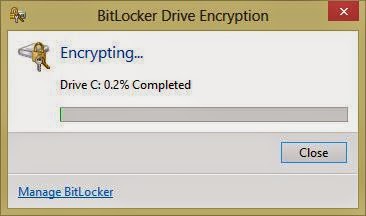
13. Start encrypting
14. Wait until encryption stops.
15. Encryption complete --> Close.
16. REQUIRED...Are you sure you printed your bitlocker key?  Make sure you print your bitlocker key because you will need it later.

17. Recommended..."Windows 7 File Recovery" image backup in case you screw up.  Speaking from experience.  Windows Key + R --> Windows 7 File Recovery.
18. Install the Ubuntu Mini CD.  This CD will give us the ability to encrypt LVMs.
19. Restart computer. Make sure your computer is connected to the internet.
20. Ubuntu should load.
21. Select Install
22. Select Language
23. Select Location
24. Configure Keyboard --> No
25. Select keyboard origin
26. Select keyboard layout
27. Make sure your computer is connected to the internet.
28. Select hostname
29. Select distribution mirror closest to you

30. Proxy if you have one
31. Select full name
32. Select user name
33. Set password
34. Re-enter password
35. Encrypt home drive --> NO (We're creating an encrypted LVM so the /home mount will already be encrypted.  If you plan on having multiple users then encrypt it to keep others out.)
36. Set time zone
37. Manual
38. Select the free space
39. Create new partition.  This will be the /boot.
40. 300 MB --> Continue

41. Logical
42. Beginning
43. Select Mount Point
44. Select /boot

45. Select boot flag
46. Yes
47. Done setting up the partition
48.
49. Select the free space
50. Create new partition
51. all space
52. Logical
53.
54. Under mount point select --> Do not mount it
55. Done setting up partition
56. 
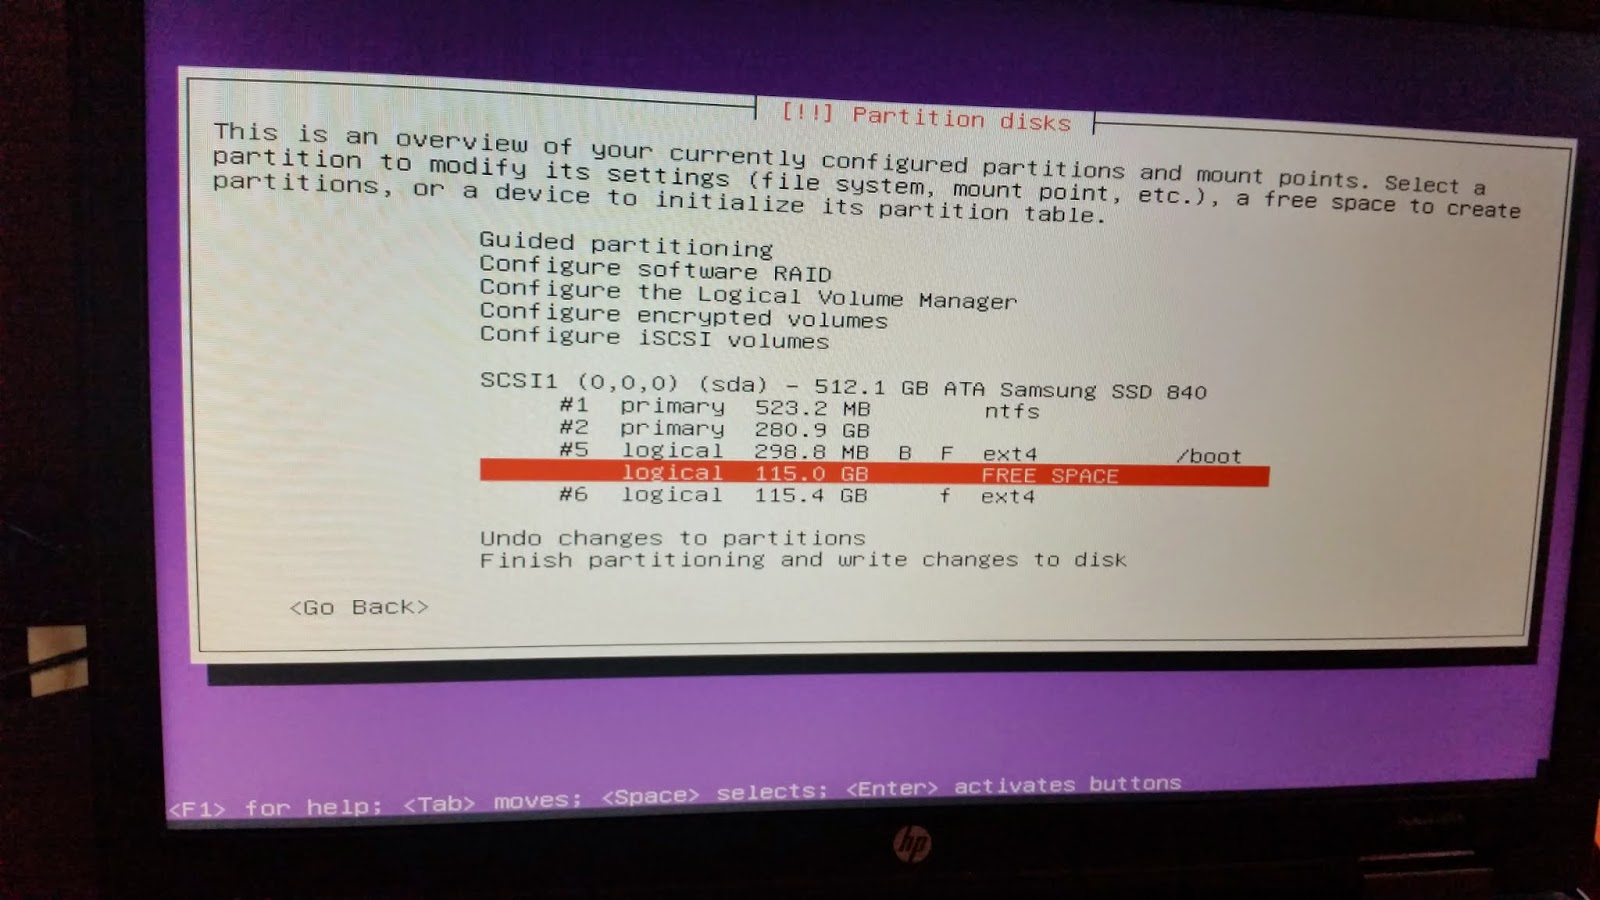
57. Select Configure encrypted volumes
58. Yes to write changes
59. Create encrypted volume
60. Select the partition just created with the space bar to add the star --> Continue
61. Done setting up the partition
62. Yes write changes
63. Finish
64. Add encryption password
65. Re-enter encryption password
66. Select Configure the Logical Volume Manager
67. Yes write changes
68. Create Volume Group

69. Name it something
70. Select the crypt partition
71. Create logical volume
72. Select your volume group
73. Logical volume name the first one swap
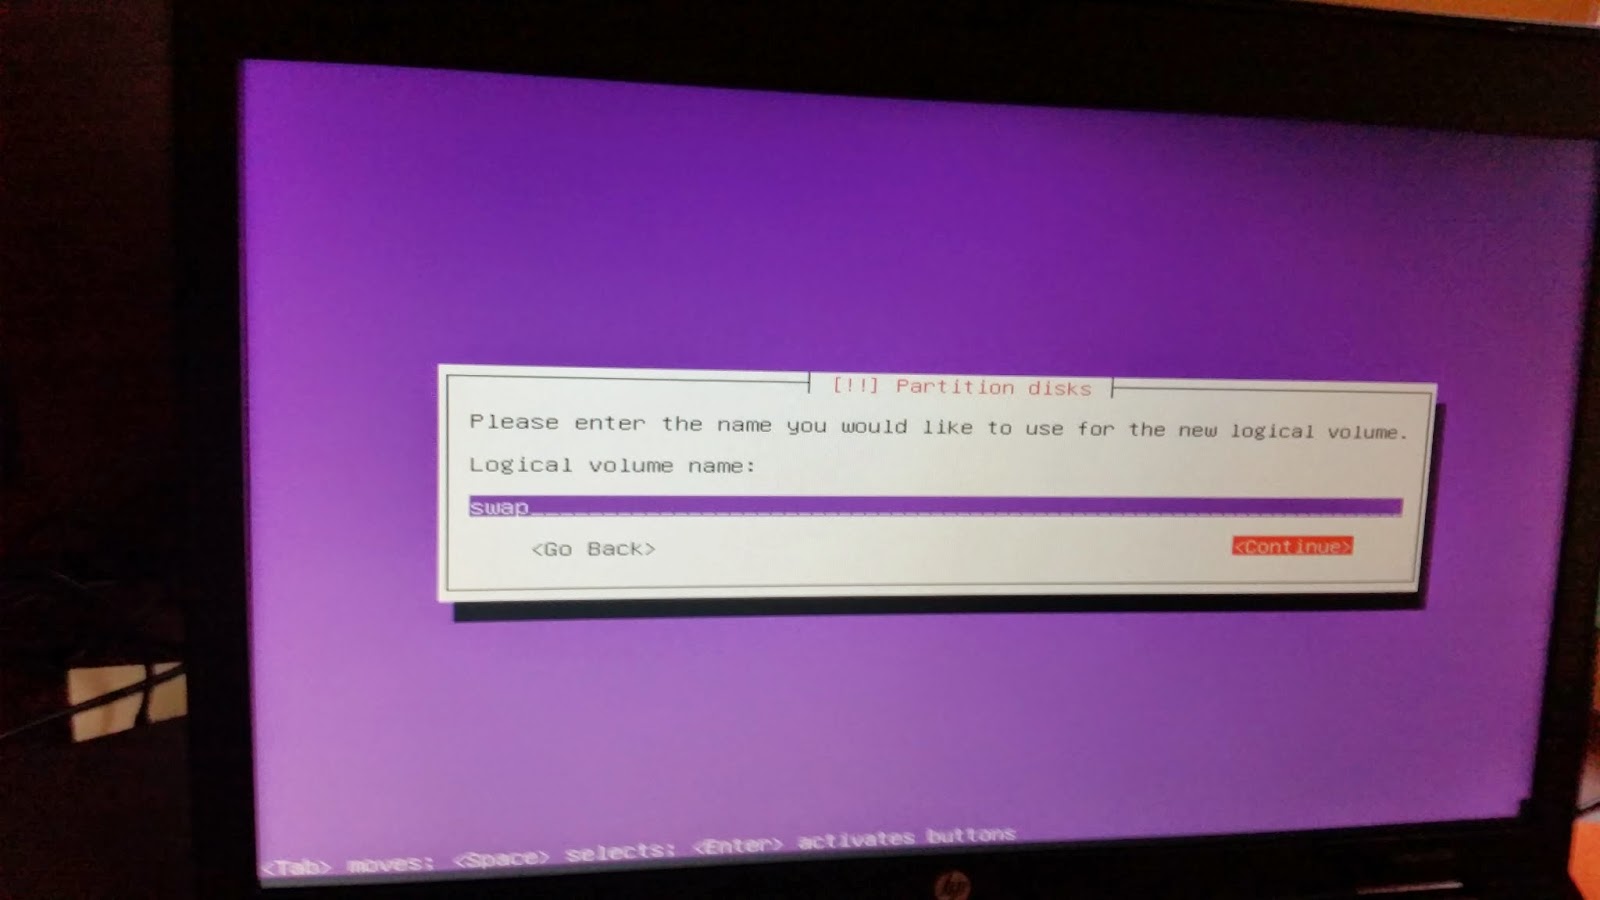
74. I made the size a little over half of my RAM
75. Create logical volume
76. Select your volume group
77. Logical volume name the second one root
78. I used the remaining

79. Finish
80. Select the root partition within the encrypted volume
81. Use as
82. Ext4
83. Mount point
84. /
85. Done setting up partition
86. Select the swap within the encrypted volume
87. Use as
88. swap area
89. Done setting up partition
90. Should look similar
91. Finish partitioning and write changes to disk
91. No to returning to partitioning menu
92. Yes write changes
93. Installation should start
94. Install security update automatically
95. I select OpenSSH (in case i want access the Ubuntu via port 22) and Ubuntu Desktop.  You select what you want.

96. Yes install GRUB to MBR
97. Finish
98. Now when I reboot I got the following message
99. You might not.  I made sure I had Fast Boot off.
100. Also had legacy boot mode on...NO UEFI
101. I rebooted with the Ubuntu 14.04.1 Desktop Install DVD...not the mini
102. I selected Boot from first hard disk
103. It gave me the options for Ubuntu or Windows 8.
104. Select Ubuntu
105. Login with your encryption password
106. Login with your user name
107. Open a terminal prompt
108. We need to add the boot-repair program.
109. Enter the following commands on terminal

sudo add-apt-repository -y ppa:yannubuntu/boot-repair
sudo apt-get update
sudo apt-get install -y boot-repair && boot-repair 
 
110. Boot repair should start
111. Yes
112. OK
113. Recommended repair
114. Yes
115. OK
116. Enter the listed commands into a new terminal and select yes at the windows screen.
117. Forward
118. Do the same for the following screen
119. Forward
120. Select the /dev/sda partition
121. Finished --> OK
122. Reboot the system
123. You should see the Ubuntu GRUB menu

124. Select Windows 8
125. Enter your bitlocker key (This is because the MBR was changed and Windows didn't like that.  It wants to know everything is okay.  You should not have to enter the key again.)

126. Windows should load.


Monday, June 16, 2014

How I installed Owncloud v6.0.3 + on Ubuntu Server 14.04

Update; 1 Jul 14

Decided to try installing via the:

http://software.opensuse.org/download/package?project=isv:ownCloud:community&package=owncloud


The version installed was 6.0.4.1 at the time.


This gives the ability if there are updates that they will be installed automatically through apt-get updates and no more manual updates.

I crossed out the items that were not necessary with the update install version verses the manual install.

So...

1. Installed Ubuntu Server 14.04 on the computer. 
2. Installed with OpenSSH and LAMP.  Root should be the default admin account created for mysql.  Remember the password.
3. Performed updates:

sudo apt-get update

4. Performed upgrades:

sudo apt-get upgrade

5. Perform additional required installs (In Accordance With [IAW] Owncloud v6 Manual Installation):

sudo apt-get install php5-gd php5-json php5-mysql php5-curl php5-intl php5-mcrypt php5-imagick

6. Downloaded owncloud-6.0.3.tar.bz2:

sudo wget http://download.owncloud.org/community/owncloud-6.0.3.tar.bz2


sudo sh -c "echo 'deb http://download.opensuse.org/repositories/isv:/ownCloud:/community/xUbuntu_14.04/ /' >> /etc/apt/sources.list.d/owncloud.list"

sudo apt-get update

wget http://download.opensuse.org/repositories/isv:ownCloud:community/xUbuntu_14.04/Release.key

sudo apt-key add - < Release.key

sudo apt-get install owncloud

7. Extracted the contents:

sudo tar xjf owncloud-6.0.3.tar.bz2

8. Moved the owncloud directory to the proper location /var/www/html/owncloud:

sudo mv owncloud /var/www/html/

9. Changed permission on the owncloud directory recursively:

sudo chown -R www-data:www-data /var/www/html/owncloud


10. Enabled ssl within Apache2"

sudo a2enmod ssl 
sudo a2ensite default-ssl 
sudo service apache2 restart
 
11. Modified the default-ssl file for Apache2:


sudo nano /etc/apache2/sites-available/default-ssl.conf


Add ServerName; 


 Add owncloud;


<Directory /var/www/html/owncloud>
    Options Indexes FollowSymLinks MultiViews
    AllowOverride All
    Require all granted
</Directory>


12. Enable mod_rewrite


sudo a2enmod rewrite

sudo service apache2 restart 

13. Might get error "Could not reliably determine the server's fully qualified domain name"

Add FQDN to /etc/hosts

sudo nano /etc/hosts


sudo service apache2 restart

14. Log into your owncloud via http
-You will get a warning that your data directory is exposed.  We'll change that later.
-Create an admin account name with password.
-Leave the data folder alone.
-Hopefully you remembered the mysql root password.
-Call you database "owncloud_db".
-The database will be located on the "localhost".


15. Close the client download window.
-Select admin (upper right corner) --> users


16. Create your first user.
-Provide that user with enough storage space.
-Select admin again and logout.


17. Lets fix the data folder.  You can ultimately determine were you want your data folder.  I choose the root.

sudo mv /var/www/html/owncloud/data /


18. Now we also have to tell owncloud where it went:


You will need to edit the config.php file and add the fqdn:

sudo nano /var/www/html/owncloud/config/config.php

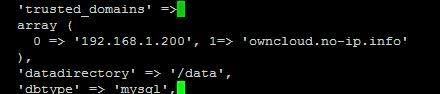
Change; 'datadirectory' => '/data',
Add your FQDN; 1=> 'owncloud.no-ip.info'


19. You should be able to access https now without complaint.  Running owncloud through http is not healthy.  It should be running under https.  If you check the ssl cert (view certificates) the default cert used should be from the ubuntu installation and have the computer name in the "issued to" "issued by".


20. OPTIONAL if you dont like the default sizes to upload make these changes:

sudo nano /etc/php5/apache2/php.ini

Change;
post_max_size = 4G
cgi.fix_pathinfo = 0
upload_max_filesize = 4G
date.timezone = "America/New_York"

21. You should be good to go.

UPDATE; 16 Jun 14


1. If you get the following error: isWebDAVWorking: NO - Reason: [CURL] Error while making request: SSL: certificate subject name 'XXXXX' does not match target host name 'YYYYY'

sudo nano /var/www/html/owncloud/3rdparty/Sabre/DAV/client.php

Find; <ctrl w>
curlsettings

Add below;

CURLOPT_SSL_VERIFYPEER => 0,
CURLOPT_SSL_VERIFYHOST => 0,


sudo service apache2 restart

2. I also added my own self created certs instead of using the default.


Now to get https ssl working with OwnCloud I created self-signed certs.  Remember the self signed password as it will ask you again.

sudo openssl genrsa -des3 -out /etc/ssl/server.key 4096

sudo openssl req -new -key /etc/ssl/server.key -out /etc/ssl/server.csr

sudo openssl x509 -req -days 3650 -in /etc/ssl/server.csr -signkey /etc/ssl/server.key -out /etc/ssl/server.crt

sudo openssl rsa -in /etc/ssl/server.key -out /etc/ssl/server.key.insecure

sudo mv /etc/ssl/server.key /etc/ssl/server.key.secure


sudo mv /etc/ssl/server.key.insecure /etc/ssl/server.key

sudo mkdir /etc/apache2/ssl

sudo cp /etc/ssl/server.key /etc/apache2/ssl

sudo cp /etc/ssl/server.crt /etc/apache2/ssl

sudo ln -s /etc/apache2/sites-available/default-ssl.conf /etc/apache2/sites-enabled/000-default-ssl.conf

sudo nano /etc/apache2/sites-available/default-ssl.conf

#   SSL Engine Switch:
#   Enable/Disable SSL for this virtual host.
SSLEngine on
#   A self-signed (snakeoil) certificate can be created by installing

#   the ssl-cert package. See
#   /usr/share/doc/apache2.2-common/README.Debian.gz for more info.
#   If both key and certificate are stored in the same file, only the
#   SSLCertificateFile directive is needed.
SSLCertificateFile      /etc/apache2/ssl/server.crt
SSLCertificateKeyFile   /etc/apache2/ssl/server.key

#   SSLCertificateFile    /etc/ssl/certs/ssl-cert-snakeoil.pem
#   SSLCertificateKeyFile /etc/ssl/private/ssl-cert-snakeoil.key


sudo service apache2 restart